Category

Home

Category

Sheetrock is the default, but it lacks character and durability. If you’re looking for an alternative to sheetrock walls in 2026, MgO (Magnesium Oxide) boards are the top technical choice because they are virtually fireproof and mold-resistant. For aesthetic upgrades, 3D textured panels, shipplap, or plywood panels offer much higher impact resistance and a modern, “organic” look that drywall simply can’t provide.

There are several legitimate alternatives to sheetrock walls that offer better durability, more visual interest, or specific performance advantages. Here’s what’s actually worth considering.

Alternatives at a Glance

Material Cost (per sq ft installed) Durability Moisture Resistance Visual Appeal
Plywood panels $2-$5 High Moderate Moderate
Wood planks (shiplap/tongue & groove) $5-$15 High Low-Moderate High
Cement board $3-$6 Very High Excellent Low (utilitarian)
Fiber cement panels $4-$8 Very High Excellent Moderate
Stone veneer $15-$40 Very High High Very High
Brick (thin veneer) $10-$30 Very High High Very High
OSB (oriented strand board) $1-$3 Moderate Low Industrial
Paneling (MDF/wood composite) $3-$10 Moderate Low Moderate-High

1. Plywood Wall Panels

Plywood is one of the most overlooked wall materials. Modern plywood in birch or Baltic plywood creates a clean, contemporary look – especially in home offices, studios, and Scandinavian-inspired interiors.

Best for: Home offices, garages, utility rooms, design-forward spaces

Pros: Strong, accepts stain or paint, durable against impact

Cons: Seams need attention; not moisture-proof without treatment

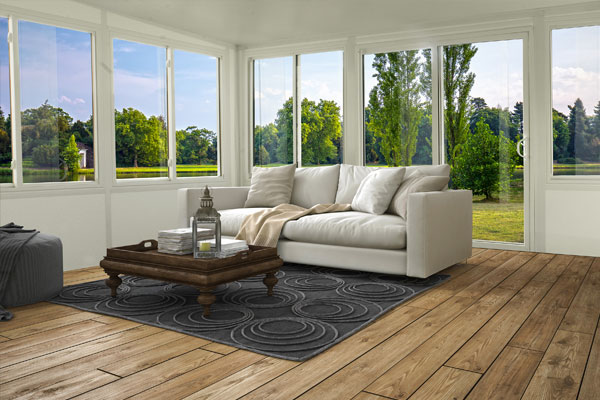
2. Shiplap and Wood Planks

The farmhouse and coastal design movements made shiplap famous, and it’s earned its place. Horizontal tongue-and-groove or shiplap boards create genuine warmth that painted drywall can never replicate.

Best for: Living rooms, bedrooms, accent walls

Pros: Timeless look, easy DIY installation, excellent resale value

Cons: More expensive than drywall, not for high-humidity areas without sealing

3. Cement Board

Cement board (like Hardiebacker or Durock) is primarily known as a tile substrate – but in industrial and modern interiors, it’s used as a finished wall material. Raw cement board has an honest, utilitarian aesthetic.

Best for: Bathrooms, kitchens, laundry rooms, behind wood stoves

Pros: Waterproof, fire-resistant, extremely durable

Cons: Heavy, harder to cut, requires specific fasteners

4. Fiber Cement Panels

Fiber cement panels combine cement with cellulose fibers to create a lightweight but incredibly durable panel. Brands like James Hardie make interior panels specifically for wet areas.

Best for: Bathrooms, laundry rooms, mudrooms, commercial-style kitchens

Pros: Moisture and mold resistant, very durable, holds paint well

Cons: Heavier than drywall, generates silica dust when cut (wear a mask)
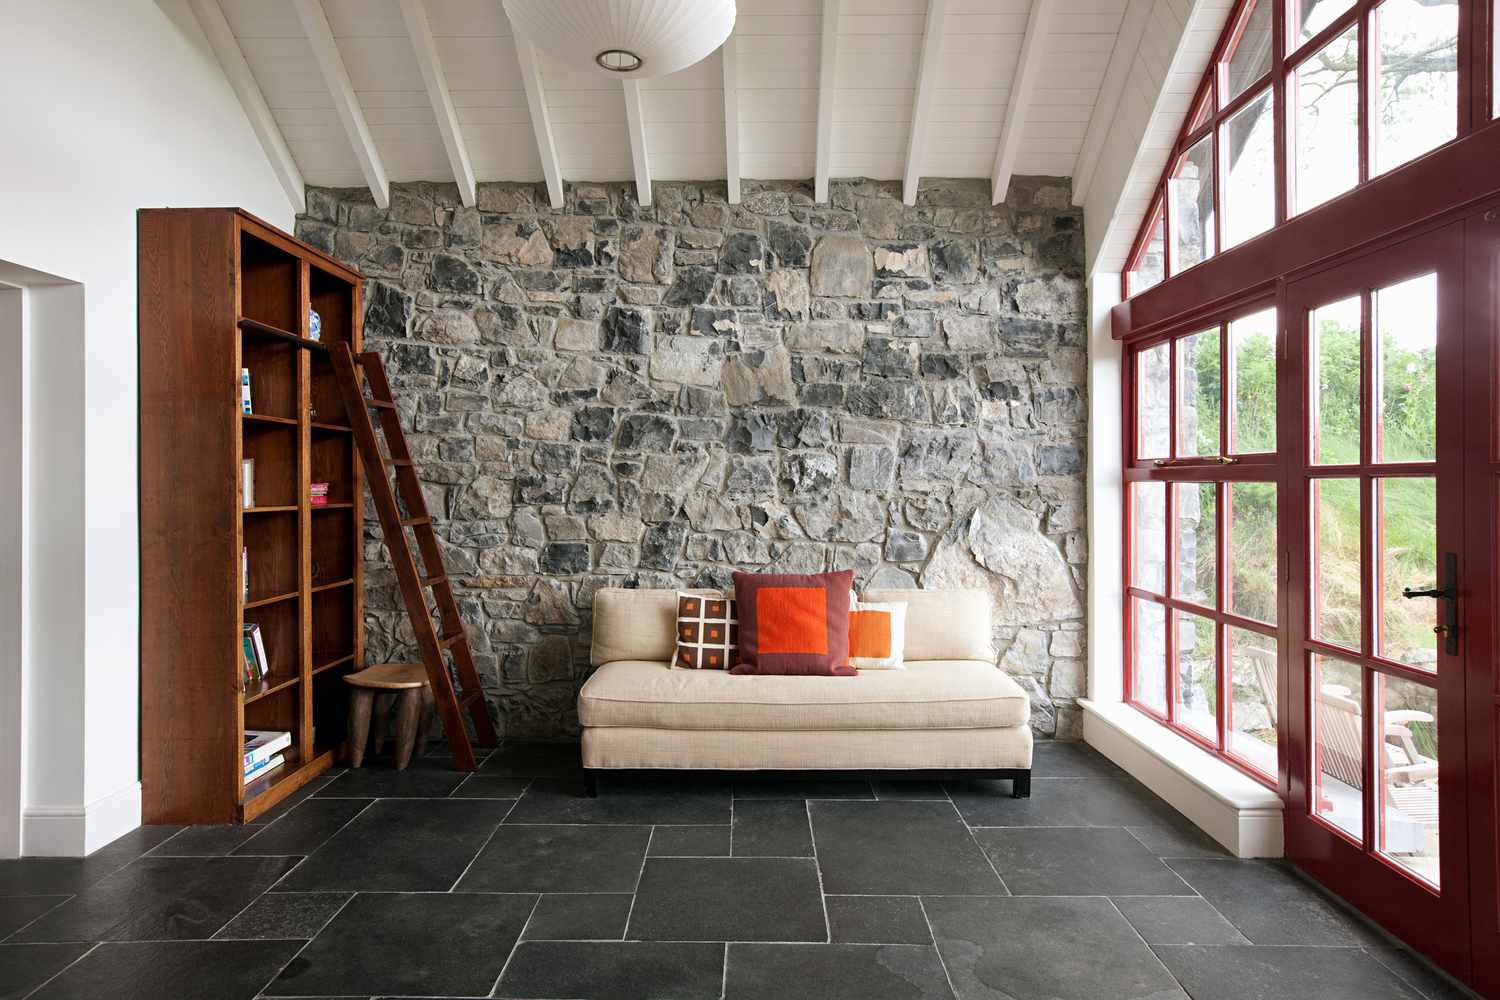
5. Stone Veneer

Thin stone veneer panels apply directly to a prepared wall surface. The result looks like real stone masonry at a fraction of the weight and cost of full stone.

Best for: Fireplace surrounds, accent walls, entryways

Pros: Incredible visual impact, very durable, adds significant value

Cons: Expensive, requires skilled installation, heavy (may need structural support)

6. Thin Brick Veneer

Like stone veneer but with brick. Thin brick slices (½”-¾” thick) adhere to wall surfaces and look exactly like full brick masonry.

Best for: Feature walls, kitchen backsplashes, basement bars, lofts

Pros: Authentic brick look, durable, excellent character

Cons: Labor-intensive installation, grout maintenance

7. OSB (Oriented Strand Board)

Raw OSB has become a design choice in itself – particularly in industrial, minimalist, and budget-conscious builds. The layered, textured surface has a raw, honest look when sealed.

Best for: Garages, workshops, studio spaces, accent walls in industrial-style homes

Pros: Very inexpensive, extremely strong, good DIY material

Cons: Low moisture tolerance, strong initial odor (formaldehyde in adhesives)

8. Wood Composite and MDF Paneling

Pre-finished or paintable MDF panels offer a classic wainscoting or board-and-batten look without the complexity of custom carpentry.

Best for: Formal living rooms, dining rooms, hallways

Pros: Affordable, clean finish, lots of profile options

Cons: Not moisture-resistant, heavier than drywall

Which Alternative Is Right for You?

Your Priority Best Option
Budget OSB or plywood
Visual impact Stone or brick veneer
Wet area (bathroom/kitchen) Cement board or fiber cement
Farmhouse/coastal style Shiplap or wood planks
Industrial modern OSB or cement board
Classic formal look Wood paneling/MDF

The best alternative to sheetrock walls depends entirely on what problem you’re trying to solve – moisture, aesthetics, durability, or all three. Most alternatives cost more than drywall but deliver character and performance that standard sheetrock simply can’t match.

Sharpie permanent marker is designed to stick, but “permanent” is relative. The key to what removes sharpie marker is using a surface-specific solvent. For hard surfaces like whiteboards or plastic, isopropyl alcohol or a Magic Eraser works best. For skin, hand sanitizer or baby oil is effective. If you’ve accidentally marked fabric, hairspray (with high alcohol content) or distilled white vinegar can often lift the pigment before it sets in the wash.

Here’s exactly what to use, organized by surface.

Surface-by-Surface Removal Guide

Surface Best Removal Method What Not to Use
Skin Rubbing alcohol or hand sanitizer Acetone – too harsh
Fabric/clothing Rubbing alcohol + dish soap Bleach on colored fabric
White walls (painted) Magic eraser or rubbing alcohol Abrasive scrubbers
Colored/painted walls Hairspray or rubbing alcohol (dab gently) Magic eraser – removes paint
Wood (finished) Rubbing alcohol Acetone – removes finish
Wood (unfinished) Sanding or oxalic acid Water alone
Glass Dry erase marker trick, then wipe Nothing – most things work
Whiteboard Dry erase marker over it, wipe Acetone – damages surface
Plastic Rubbing alcohol or nail polish remover Acetone on soft plastics
Leather Rubbing alcohol (diluted) Acetone – destroys leather
Ceramic/tile Acetone or rubbing alcohol Nothing – both work well
Paper Mostly permanent – try lemon juice Wet methods – spread ink
Carpet Rubbing alcohol + blotting Scrubbing – spreads stain
Metal Acetone or rubbing alcohol Nothing – both work
Dry erase board Dry erase marker method Acetone can damage coating

The Dry Erase Marker Trick (For Whiteboards and Glass)

This sounds too good to be true but it works: draw over the Sharpie marks with a dry erase marker, then immediately wipe with a cloth.

Why it works: dry erase markers contain a non-polar solvent that dissolves the permanent marker ink. When you draw over it and wipe, you’re lifting both inks simultaneously.

This is the safest method for whiteboards because it doesn’t risk damaging the whiteboard coating the way harsh solvents can.

Rubbing Alcohol: The MVP

Isopropyl rubbing alcohol (70% or 91%) is the single most versatile Sharpie remover. It works on most surfaces, is cheap, widely available, and won’t damage most finished surfaces.

How to apply it:

  1. Dampen a cotton ball or cloth – don’t soak
  2. Dab (don’t rub) the stained area
  3. Blot with a clean cloth to lift the ink
  4. Repeat until gone
  5. Clean the area with water after treatment

On Fabric: Act Fast

On clothing and fabric, speed matters. Fresh Sharpie marks come out much more easily than dried, set ink.

Best method:

  1. Place the fabric stain-side down on paper towels
  2. Apply rubbing alcohol from the back of the fabric – this pushes the ink into the towels rather than deeper into fibers
  3. Blot, move to a clean area of towel, repeat
  4. Follow with dish soap worked into the stain
  5. Wash in warm water per fabric care instructions

For very set stains, commercial ink remover products (like Amodex) outperform home remedies.

On Walls: Proceed Carefully

This is where you have to be careful. The wrong method removes paint along with the marker.

For flat/matte painted walls: Rubbing alcohol on a cloth, very gentle dabbing. Test in a hidden area first – matte paint can dull or lighten.

For semi-gloss or gloss painted walls: Magic Eraser (melamine foam) works well and won’t strip the paint. Semi-gloss is durable enough to handle it.

For colored walls: Magic eraser can lightly abrade the paint surface and create dull spots. Use rubbing alcohol dabbed gently instead.

What Never Works (No Matter What Anyone Says)

  • Water alone – Sharpie is waterproof by design
  • Regular soap and water – not strong enough on most surfaces
  • Toothpaste – mildly abrasive, very slow, inconsistent results

For Really Stubborn Marks

When standard methods don’t work, escalate to:

  • Acetone (nail polish remover) – powerful but can damage many surfaces; best reserved for glass, metal, and ceramic
  • Commercial ink removers – Amodex, De-Solv-It, or Goo Gone for specific surfaces
  • Fine sanding – last resort for wood surfaces; requires refinishing afterward

The right approach to removing Sharpie marker is always to start with the gentlest method (rubbing alcohol) and escalate only if needed. Most surfaces respond well to alcohol – you rarely need to go further.

Walk into any well-decorated home and there’s a good chance you’ll spot a trailing plant with creamy white and green leaves spilling from a shelf or hanging planter. That’s almost certainly epipremnum aureum marble queen – the most visually striking variety of the beloved pothos family.

What makes it special isn’t just the looks. Marble queen pothos is one of the most forgiving houseplants you can own, yet it rewards attentive care with leaves so heavily variegated they look almost painted. Here’s what you need to know to keep yours thriving.

What Makes Marble Queen Different?

Epipremnum aureum has many cultivars – golden pothos, neon pothos, pearls and jade – but marble queen stands out because of its extreme variegation. The leaves are marbled with white, cream, and pale green in irregular patterns. No two leaves are identical.

The trade-off: all that white means less chlorophyll. Less chlorophyll = slower growth than golden pothos. But for most plant owners, the stunning appearance is absolutely worth the slightly slower pace.

Care Essentials at a Glance

Factor Ideal Condition
Light Medium to bright indirect light
Water Every 1-2 weeks; let top 2 inches dry out
Humidity 40-60% (average home is fine)
Temperature 65-85°F (18-29°C)
Soil Well-draining potting mix with perlite
Fertilizer Balanced liquid fertilizer every 4-6 weeks in spring/summer
Pot Any with drainage holes
Toxicity Toxic to pets and children if ingested

Light: The Key to Keeping That Variegation

Here’s the thing most guides skip over: the marble pattern depends on light.

In low light, marble queen pothos will slowly revert – producing more green leaves and losing the white marbling. It’s the plant’s survival response: more chlorophyll to capture more light.

To maintain that gorgeous white-and-green contrast:

  • Place in bright, indirect light – near an east or north-facing window works beautifully
  • Avoid direct sun, which scorches the pale portions of the leaves
  • If you notice new leaves coming in mostly green, it’s telling you it needs more light

Watering: Easy, But Don’t Overdo It

Marble queen pothos is very drought tolerant. The number one killer is overwatering, not underwatering.

Let the top 2 inches of soil dry out before watering again. In winter, scale back – the plant’s growth slows and it needs far less water.

Signs you’re overwatering:

  • Yellow leaves (especially lower leaves)
  • Soft, mushy stems at the base
  • Soil that stays wet for more than 10 days

Signs you’re underwatering:

  • Wilting or curling leaves
  • Dry, crispy edges
  • Leaves losing their glossy sheen

Why It’s a Trailing Champion

Given something to trail from – a hanging basket, a high shelf, a bookcase – epipremnum aureum marble queen will cascade beautifully, with vines reaching 6-10 feet indoors. The longer the vines, the more impact the variegation has visually.

To encourage fuller growth, pinch back long vines occasionally. This redirects energy into new growth closer to the base and keeps the plant looking lush rather than stringy.

Propagation: Embarrassingly Easy

This is where marble queen really wins. Propagating is simple:

  1. Cut a vine just below a node (the bump where a leaf meets the stem)
  2. Remove the bottom leaves
  3. Place in water or moist soil
  4. Roots appear in 2-4 weeks
  5. Transfer to soil once roots are 1-2 inches long

One plant can become five within a season. It makes an excellent gift – and frankly, it’s hard to stop propagating once you start.

Common Problems

Issue Cause Solution
Green leaves replacing white Too little light Move to brighter spot
Yellow leaves Overwatering Reduce watering frequency
Brown crispy tips Low humidity or underwatering Mist occasionally or use a pebble tray
Leggy vines with small leaves Low light + infrequent fertilizing Increase light and feed monthly
Root rot Waterlogged soil Repot in fresh well-draining mix

The Honest Verdict

Epipremnum aureum marble queen is a plant that genuinely earns its reputation. It looks expensive, it’s nearly impossible to kill with reasonable care, it propagates freely, and it grows in places most plants refuse – low-light corners, humid bathrooms, trailing off high furniture.

If you want one houseplant that makes a visual statement without demanding constant attention, this is it.

In Toledo, where seasonal temperature shifts and lake-effect weather influence home performance, passive solar design offers practical advantages for off-grid food storage. A well-planned solar pantry uses natural heat, airflow, and insulation to keep food stable without relying on electrical systems. 

This approach supports sustainability goals while improving household resilience during power outages common in Northwest Ohio winters.

Understanding Passive Solar Pantry Principles

A solar pantry relies on strategic placement and material selection rather than mechanical heating or cooling. In Toledo’s climate, the goal is to capture winter sun while limiting summer heat gain.

Key principles include:

  • South-facing orientation to maximize low-angle winter sunlight
  • Thermal mass (brick, stone, or concrete) to absorb and slowly release heat
  • Insulated north walls to reduce cold air infiltration from Lake Erie winds
  • Ventilation controls to regulate humidity and temperature

When these elements are combined, the pantry remains cool enough for dry goods and root vegetables while preventing moisture buildup that causes spoilage.

Ideal Placement for Toledo Homes

Older homes in Toledo often have basements or rear utility rooms that can be adapted into solar pantries. Newer builds may integrate the pantry into mudrooms or enclosed porches on the south side of the home.

Effective location strategies include:

  • Adjacent to the kitchen for convenience while remaining thermally separated
  • Against a shared masonry wall to benefit from retained heat
  • Near exterior vents that allow seasonal airflow adjustment
  • Beneath stairwells or sunrooms where temperature fluctuations are moderate

Proper placement ensures the pantry stays within a stable temperature range even during Ohio’s rapid weather changes.

Design Features That Support Off-Grid Storage

To function independently of power, the pantry must rely on structural features that naturally regulate temperature and humidity.

Recommended design elements:

  • Double-glazed solar windows angled to receive winter sunlight
  • Removable insulated shutters to block summer heat
  • Stone or tile flooring to stabilize temperature swings
  • Passive vent stacks that release warm air during warmer months

In Toledo’s humid summers, humidity control is especially important. Natural ventilation combined with breathable shelving materials helps prevent mold and condensation.

Food Storage Zones for Different Needs

An efficient solar pantry separates storage by temperature and moisture requirements. This zoning improves shelf life and reduces waste.

Typical pantry zones include:

  • Cool, dark shelves for potatoes, onions, and squash
  • Dry storage racks for grains, flour, and preserved goods
  • Warm upper shelves for proofing bread or storing oils
  • Hanging baskets for airflow around produce

This layered approach allows families in Toledo to store locally sourced produce from farmers’ markets well into the colder months.

Construction Materials Suitable for Toledo’s Climate

Material choice directly affects performance and durability. Homes near the Maumee River or Lake Erie benefit from moisture-resistant construction.

Preferred materials include:

  • Clay brick or stone for thermal mass and longevity
  • Cork or mineral wool insulation for breathability
  • Stainless steel or sealed wood shelving to resist humidity
  • Light-colored interior surfaces to reflect available sunlight

These materials support long-term storage without creating damp conditions that attract pests.

Maintenance and Seasonal Adjustments

Even passive systems require simple seasonal management to stay effective.

Best practices for Toledo homeowners:

  • Open vents in late spring to release excess heat
  • Close vents and add insulation in early winter
  • Inspect seals and window glazing before frost season
  • Rotate stored foods according to harvest cycles

Takeaway 

In Toledo, off-grid food storage through passive solar pantry design is both practical and environmentally responsible. By using sunlight, thermal mass, and natural airflow, homeowners can protect food supplies while lowering utility costs. Thoughtful placement, durable materials, and organized storage zones ensure consistent performance across Ohio’s varied seasons. 

A solar pantry is not only a sustainable feature but also a resilient solution for households seeking greater self-sufficiency in an unpredictable climate.

In Fresno, where sunshine is abundant and summer temperatures regularly climb, interior design must respond thoughtfully to both light and heat. Solar gain interior design focuses on managing how sunlight enters and affects indoor spaces, allowing rooms to remain bright while preventing discomfort from excess warmth. 

When applied correctly, this approach supports energy efficiency, improves comfort, and enhances the daily experience of living in Fresno homes.

Understanding Solar Gain in Fresno’s Climate

Solar gain occurs when sunlight passes through windows and raises the temperature of interior surfaces and air. In Fresno’s long warm seasons, unmanaged solar gain can quickly lead to overheated rooms and higher cooling costs. However, when controlled, solar gain becomes an asset that supports daylight use and reduces reliance on artificial lighting.

Key elements that influence solar gain include:

  • Window orientation, particularly exposure to the west and south
  • Type of glazing, including heat-reflective or tinted glass
  • Interior surface materials that absorb or reflect warmth
  • Shading systems, both interior and exterior

Design decisions must consider Fresno’s strong afternoon sun and mild winters to achieve year-round balance.

Window Design That Adjusts to Seasonal Sun

Windows are the primary drivers of solar gain, making them a central focus of adaptive interior design in Fresno.

Effective window strategies include:

  • South-facing windows with roof overhangs to block high summer sun while allowing winter light
  • Low-emissivity (Low-E) glass to limit heat penetration without reducing brightness
  • Dual-layer window coverings, combining sheer panels with insulated drapes
  • Exterior shading devices, such as solar screens or adjustable awnings

These features allow residents to regulate heat during peak summer hours while maintaining pleasant daylight during cooler months.

Using Thermal Mass to Stabilize Indoor Temperatures

Thermal mass refers to materials that absorb heat during the day and release it slowly as temperatures drop. In Fresno homes, incorporating thermal mass into interior design helps moderate daily temperature swings.

Common thermal mass elements include:

  • Tile, stone, or concrete flooring in sun-exposed areas
  • Masonry feature walls near large windows
  • Built-in seating or partitions made from dense materials

These surfaces collect warmth during daylight hours and gradually release it in the evening, supporting more stable indoor conditions without mechanical systems.

Room Placement That Works With the Sun

How rooms are positioned within a home greatly affects their comfort level throughout the day. In Fresno, thoughtful spatial planning ensures that frequently used areas benefit from natural light without excessive heat.

Recommended layout considerations include:

  • Locating living and dining areas on the east or southeast side for gentle morning sunlight
  • Placing bedrooms away from western exposure to reduce nighttime heat retention
  • Designing shaded transition spaces, such as covered patios or enclosed porches, to buffer intense sun
  • Maintaining open circulation paths to encourage cross-ventilation

These layout strategies help distribute light and heat more evenly across interior spaces.

Interior Finishes That Support Heat and Light Control

Interior finishes play an important role in managing how light and heat behave inside Fresno homes. Color, texture, and material selection can either amplify or soften the effects of solar exposure.

Design choices that support solar-responsive interiors include:

  • Light-toned wall colors to reflect daylight deeper into rooms
  • Matte finishes to reduce glare from direct sunlight
  • Natural textiles, such as cotton and linen, that remain cooler to the touch
  • Minimal heavy upholstery in sun-facing rooms to prevent heat buildup

Creating Comfortable, Sun-Responsive Interiors in Fresno

Solar gain interior design allows Fresno homeowners to embrace sunlight while controlling its impact on indoor comfort. By combining strategic window design, heat-regulating materials, thoughtful room placement, and supportive interior finishes, homes can adapt naturally to daily and seasonal temperature changes. 

Rather than relying solely on mechanical cooling, well-planned interiors work with Fresno’s climate to create spaces that feel bright, balanced, and consistently comfortable year-round.

In New York, daily dog walks often involve busy sidewalks, neighborhood parks, and unpredictable weather. From slushy winter streets to muddy spring trails, pets can bring dirt and moisture straight to the front door. A pet-friendly mudroom creates a clean transition zone where dogs can be washed, dried, and organized before entering the main living areas. 

With thoughtful design, New York homes of all sizes can benefit from this practical space.

Why Pet-Focused Mudrooms Matter in New York

Urban living in New York means pets are frequently exposed to dust, rain, and road salt. Without a proper entry area, these elements spread quickly across floors and furniture. A dedicated mudroom helps control mess while making routines more efficient for owners.

Key benefits include:

  • Reduced cleaning time throughout the home
  • Protection of interior flooring from moisture and scratches
  • Faster transitions after park visits or vet appointments
  • Better organization of pet-related items

In both city apartments and suburban New York houses, mudrooms can be adapted to fit available entryways, basements, or garage connections.

Designing Practical Dog Wash Stations

A well-designed wash station allows owners to rinse muddy paws or give full baths without moving pets through the home. This is especially valuable during New York’s wet seasons.

Effective wash station features include:

  • Raised bathing platforms: Minimize bending and improve comfort during washing.
  • Handheld sprayers: Offer flexible water control for gentle rinsing.
  • Slip-resistant surfaces: Help prevent falls when floors are wet.
  • Temperature-controlled water: Keeps dogs comfortable during colder New York months.

For smaller spaces, compact walk-in shower units or deep utility sinks can serve as efficient alternatives to full bathing stations.

Storage Solutions for Dog Gear and Supplies

Organized storage prevents clutter and keeps daily essentials within easy reach. In New York households where space is often limited, vertical and built-in storage is especially valuable.

Recommended storage options include:

  • Wall-mounted hooks: For leashes, collars, and harnesses
  • Built-in cubbies: For jackets, booties, and towels
  • Lower cabinets: For grooming products and cleaning supplies
  • Open shelves: For frequently used items that need quick access

Clearly designated storage zones help maintain order, particularly in busy New York families with multiple pets.

Choosing Durable and Easy-Care Materials

Mudrooms experience constant foot traffic and moisture, making durable materials essential. In New York homes, where mud and snow are common, surfaces must withstand frequent cleaning.

Suitable material choices include:

  • Porcelain or ceramic tile flooring: Resistant to water and scratches
  • Moisture-resistant wall panels: Protect walls near wash stations
  • Sealed cabinetry finishes: Prevent swelling and staining
  • Wash-and-wear rugs: Trap dirt while remaining easy to clean

These materials maintain both function and appearance over the long term.

Creating a Calm and Safe Transition Space

A mudroom should not only manage the mess but also support pets’ comfort. After navigating busy New York streets, dogs benefit from a calm area to pause before entering the home.

Helpful comfort features include:

  • Non-slip drying mats
  • Small resting benches or padded corners
  • Proper ventilation to reduce odors and humidity
  • Soft lighting for early morning or evening walks

These details encourage relaxed routines and safer movement for pets.

Final Thoughts 

A pet-friendly mudroom is a practical solution for New York homes where dogs regularly encounter wet sidewalks, crowded parks, and changing seasonal conditions. By providing a dedicated area for washing, drying, and organizing pet essentials, homeowners can significantly reduce dirt and moisture throughout the house while improving daily routines for both pets and people.

With thoughtful design choices, even compact New York entryways can be transformed into efficient transition spaces. Durable materials, smart storage, and safe wash stations work together to support long-term cleanliness and comfort. A well-planned mudroom ultimately protects the home while creating a welcoming, stress-free return after every walk.